

One of the most important steps in the design of any monolithic restoration is proper functional adjustment during design using the 3Shape virtual articulator. This is especially true for zirconia as this material ideally should not be ground on after sintering... or at least ground on as little as possible to avoid damaging the structure potentially leading to premature failure.
Cases done on quadrants are particularly problematic since the 3Shape VA offers only full frame articulators which function nothing like tooth guidances on quadrant articulators. This is EXACTLY why these cases almost always require a lot of adjusting at the bench creating the seemingly never ending battle between designers and finishers!!
The first step is to realize that we need to try to duplicate the geometry and movements of these situations where at least half the teeth are missing and the condyles are nowhere near a physiologic position!!
After a lot of trial and error, it turns out that using the 3Shape generic articulator and positioning the models so the VA articulator’s condyles are in about the same relative position to the teeth as those of a small plastic “glue-on” articulator is the key to success (figure 1). This is accomplished by moving the models all the way up and back in the articulator into a totally non-physiologic position just like a quadrant. Note that horizontal positioning is also adjusted as in figures 2, 3, & 4.
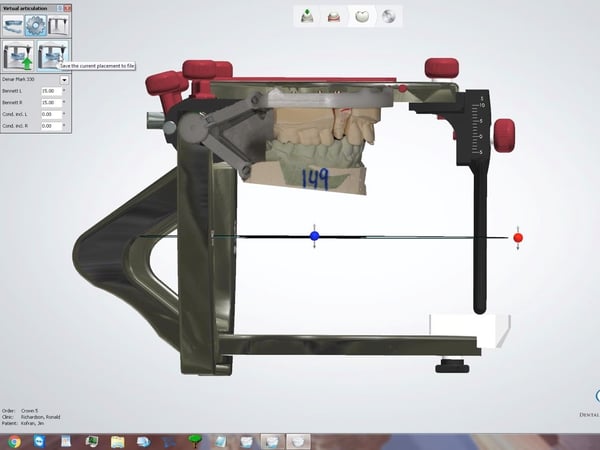 Figure 1
 Figure 2
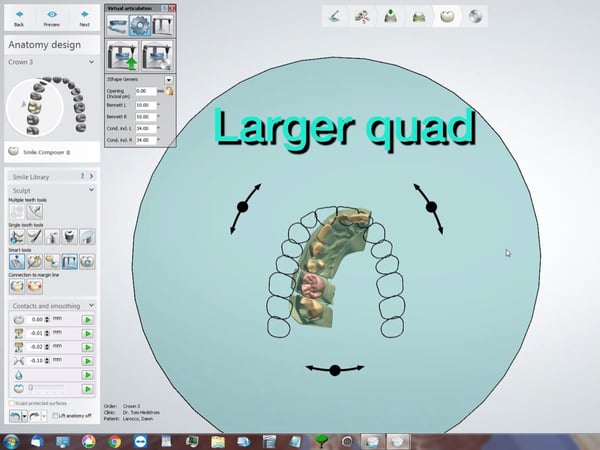 Figure 3
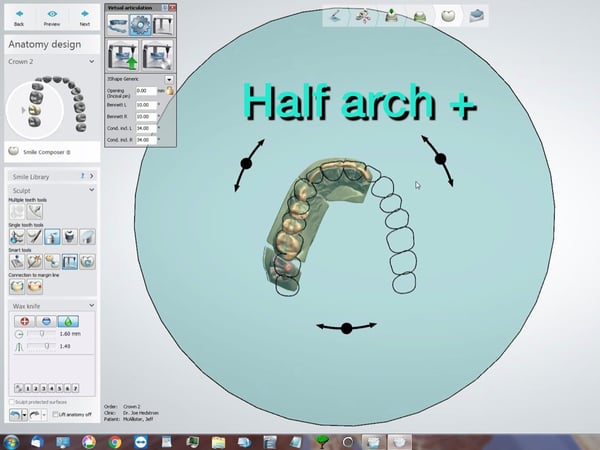 Figure 4
The other thing to realize is that with quadrants, the teeth themselves provide all the “guidance” so it is important that they ride across each other in as close to the same fashion as with the plastic articulators. Tilting the model slightly backward forces the teeth to “run into each other” in a way that is totally wrong… but very similar to what happens with these articulators (figure 5).
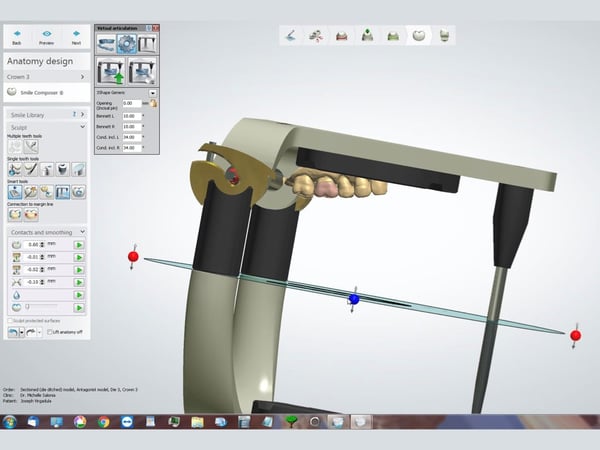 Figure 5
With the models in this “totally wrong” but similar position relative to the condyles, you will get the correct “markings” that are appropriate for the situation. Double checking that the marks seen in VA actually represent the real situation is a good idea. (figure 6) After adjusting the crown(s), the result will be very similar if not identical to what the technician will see at the bench eliminating most if not all of the heavy adjusting that is so common in these situations.
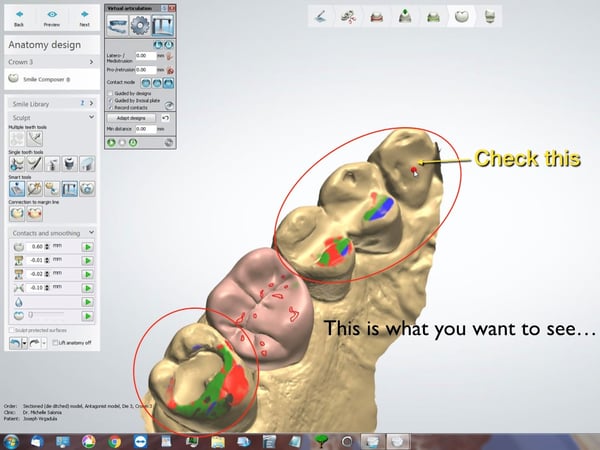 Figure 6
Once this is done, you can save and name the placement algorithm by clicking the “Save” icon in the Virtual Articulation dialog box (figure 7). In the future, you can automatically perform the placement by clicking the placement icon right next to it. Be aware that this doesn't always work perfectly and you may need to tweak the resulting maxillary placement.
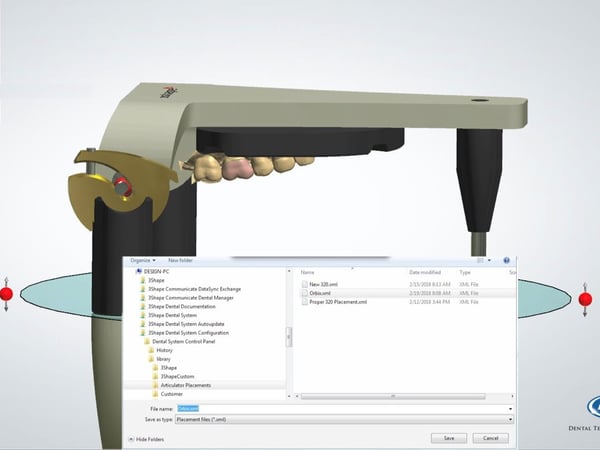 Figure 7
Achieving accurate centric (vertical dimension) and identifying the types of functional markings (occlusal compass) to be adjusted away is also very important and will be covered in an upcoming blog soon.


Leave a comment