I have had this task of writing a blog by the end of 2020 and - despite usually being fairly creative - I had major writer’s block trying to write about something that matters. Here we are, at the beginning of 2021 and I woke up out of a dead sleep singing Olivia Newton-John’s “Physical” in my head. Then suddenly the lyrics shifted from “Let’s get physical… physical – I wanna get physical… let’s get into physical…” into “Let’s get digital… digital – I wanna get digital… let’s get into digital!”
Now that song is stuck in your head, isn’t it? You’re welcome.
I know that many of you reading this blog have probably already taken the digital leap in one way or another - but many have not. I am going to break out what digital looks like with scanning, milling, and 3D printing and how training and tech support plays an important role in your success.
Scanning
When it comes to scanning and designing you have two components. Your hardware of choice, paired up with the software package that best suits your needs. The first step is to decide if you want to simply scan and outsource to a design center or scan and design in-house. Another scenario is if you are importing intraoral scans only, there is no need for a lab scanner. You can just buy a stand-alone seat of design software.
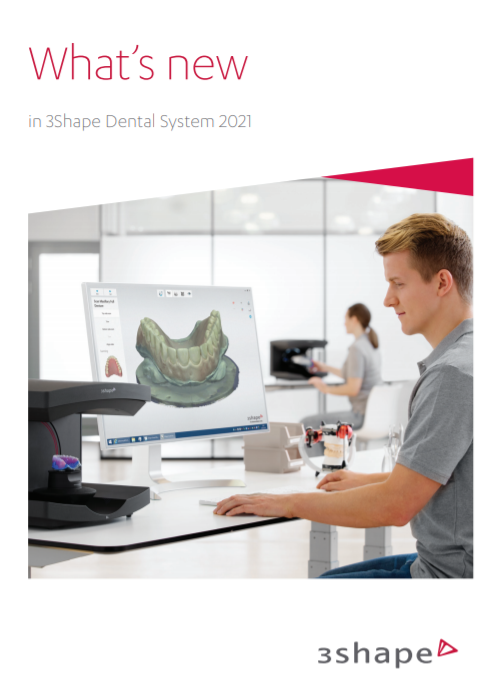
3Shape
3Shape launched its new Red Line scanners in 2020, increasing the speed of the E1, E2, and E3. The E4 still remains the fastest of their E Series scanners. How do you determine which model is right for you? If you are simply doing dentures, the E1 is completely suitable. If you are doing RPD’s and drawing a proposed design directly on the cast to scan in, I would suggest considering the E2 as it has texture scanning and will pick up the pencil marks whereas the E1 will not. If you intend to scan impressions or do anything revolving around implants, I would recommend the E3 or the E4 as the additional accuracy is important. If speed is of the essence, the E4 should be your choice.
Here is a breakdown of the Red Line series:
- E1 – Scans a full arch in 32 seconds at a 10-micron accuracy
- E2 – Scans a full arch in 24 seconds at a 10-micron accuracy + B/W Texture scanning
- E3 – Scans a full arch in 18 seconds at a 7-micron accuracy + Color Texture scanning
- E4 – Scans a full arch with the die in the model in 9 seconds at a 4-micron accuracy + Color Texture scanning
Once you have chosen the model you want, the next step is to determine which software package will best suit your needs. 3Shape has 5 options. You can go with Scan Only, Crown & Bridge, Removable, Premium, or the Complete Restorative software package. See below for the breakdown:
- Scan Only – This option allows you to receive 3Shape TRIOS® cases or scan gypsum models and send them to an external design service. If you go with the E3 or E4, the scanner will automatically come with impression scanning. Just add the impression fixture and you can start scanning impressions as well.
- Dental System Crown & Bridge - Design full anatomies, bridges, copings, frameworks, and wax-ups. You can use CAD points to provide advanced indications. Includes the ability to export scans as STL’s.
- Dental System Removables - All the indications for labs that specialize in providing full and partial dentures. Includes the ability to export scans as STL’s.
- Dental System Premium - Design all indications from the Crown & Bridge package plus splints, digital temps, digital smile design, RealView, telescopes, post & core, and more. Includes the ability to export scans as STL’s.
- Dental System Complete Restorative - Get all indications from the Premium and Removable packages plus all available restorative add-ons to design abutments, implant bars, models, and more at an attractive price. Includes the ability to export scans as STL’s.
Milling
There are four components when it comes to milling zirconia. When going with an open system, you have to pick the mill that best suits your needs along with nesting software, a vacuum, and a sintering oven. There are plenty of options on the market you can choose from including a dry mill with a single disc changer, a multiple disc changer, a wet mill, or even a combo mill that does it all! Roland is one of the more popular options out there, paired up with CIM Systems Millbox software. Hyperdent is also another software option. If you are debating between the two, I recommend that you get an online demo to see the workflow of both to determine the right one for you.
Roland
Roland has a history of dental mills. The beloved DWX-50 that was launched in March of 2010 has been discontinued for years now, evolving into the DWX-51D launched in September of 2015 followed by the DWX-52D and the DWX-52DCi 6-disc changer in January 2018. These dry mills are versatile in millable materials and there are TRK kits available to pour your own discs to mill models and dentures. The DWX-42W is their wet mill used for milling lithium disilicate. It now has an adapter you can purchase to mill titanium abutments.
Some have often wondered why Roland hasn’t brought a combo wet/dry mill to the market as of yet. To be frank, you can be far more productive having two separate mills running dry and wet without dealing with the changeover and taking a chance of contamination. With that being said, Roland offers a combo discount of $10,445 when buying the DWX-52D and DWX-42W together and a discount of $13,445 when buying the DWX-52DCi and DWX-42W together.
Printing
This is hands down one of my *most* favorite topics. We have seen a trend over the last few years, as more resins are being brought to the dental market, that additive manufacturing is on the rise. 3D printing can be significantly faster than milling and there is considerably less waste with additive manufacturing vs subtractive manufacturing. It can be confusing and difficult to choose a 3D printer with our market having plenty of options out there.
I do have a foolproof way to help you determine the best printer for you. First and foremost, you must determine if you want an open materials printer or a closed materials printer. From there - cost, accuracy, build plate size, and speed will play a factor in your decision. You can choose from SLA, LCD, or DLP technologies. Do your homework and narrow your list down to the printers that will meet your needs. From there I encourage you to send test prints to each printer manufacturer. Be sure to send the same file to everyone so that you have an apples-to-apples comparison in regards to quality and accuracy. Ask questions – lots of them. How long did it take to print? What micron layer thickness was this printed at? What was the cost of the printed part? What consumables are tied to your printer? Is tech support and training included or is that a separate fee? What if my printer goes down?
Asiga
The Asiga printer line is one that I would strongly encourage you to add to your list of printers to consider. I don’t say this just because I sell them. I truly believe this is one of the best printers on the market. Asiga is based out of Australia and they brought on Whip Mix as their first US-based dental reseller in January of 2016. The Asiga printers are phenomenal in regards to accuracy and the fact that they are truly an open materials printer puts them at the top of my list.
You have two options with Asiga – the Max or the Pro 4K.
The Asiga Max UV is a tabletop DLP printer with a build plate size of 119 x 67mm with an x,y accuracy of 62 microns. This printer has a 385-nanometer light processor that will give you a true, clear print. This printer has an internal radiometer to ensure accurate prints throughout its lifetime.
The Asiga Pro 4K is a free-standing DLP printer that has the largest build plate size available from the Asiga line, measuring 217 x 122 mm with a native x,y accuracy of 80 microns, but when running in 4K mode, you achieve an x,y accuracy of 56 microns without sacrificing speed or build plate space. The Pro 4K is also available with a 385 nanometer light processor, which means unlimited resin options, whether the resin was formulated for a 385 or 405 printer. Just like the Max, the Pro 4K has an internal radiometer to ensure accurate prints throughout the life of the printer.
Tech Support and Training
Finding the right team to train and support you in your digital journey is going to be the key to your success going digital. The best way to test the knowledge of that team and to get a feel for what support will look like, I encourage you to ask for an online demo of the package you are considering purchasing. Get a list of questions together and fire away. What are their hours for support? Ask what resources they have for your continued education so that you can grow with your investment.
I hope that this was educational and perhaps even inspired some of you that haven’t gone digital yet to at least consider what going digital could mean for you. The thought of changing the way you do business can be scary yet exhilarating at the same time. Be encouraged and🎶🎶 Don’t Stop Believin’… Hold on to That Feelin’ 🎶🎶


.jpg)


Leave a comment