


The purpose of this blog is to help your laboratory maximize its production using an Asiga 3D printer.
 While you can accomplish a lot of 3D printing during normal business hours, your Asiga 3D printer can continue printing and producing models, guides and castable patterns after normal business hours. A great example of an increased production workflow would be to produce single layer jobs during your normal business hours, then print stacked jobs after you leave the office. You can achieve this by setting up a “stacked” print job to start at the end of your normal business hours, so when you return in the morning you have a jumpstart on your production the following day. Stacking increases the number of units printed in a single print job – up to 4 or 5 times the volume!
It is fairly easy to set up a stackable print job on your Asiga printer using the Asiga Composer software. With them, you simply set up multiple single-layer print jobs using the same resin and printer. If you follow the steps below, you can achieve stackable prints and maximize your production.
In your Composer Software, set up a print job like you would normally for a single layer print. Once you have nested all of the files on the first layer, add supports to the bottom of the models (Figs.1 & 2).
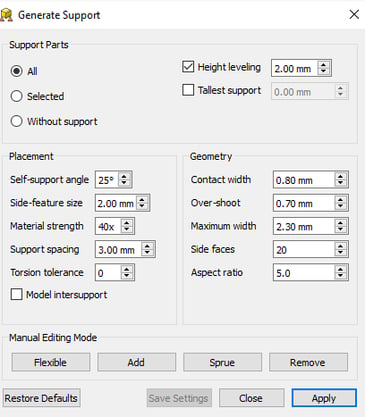
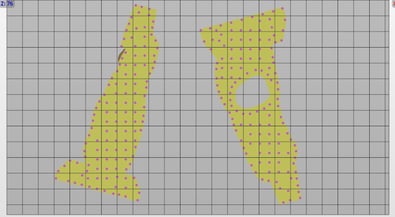
Fig. 1 Fig. 2
Now click the “Generate Multi Stacking” icon in the toolbar at the top of the screen. You will need to add a Scaffold Plate and Scaffold Columns to support the plate (Fig. 3). We typically use the following settings for the scaffold plate and columns.
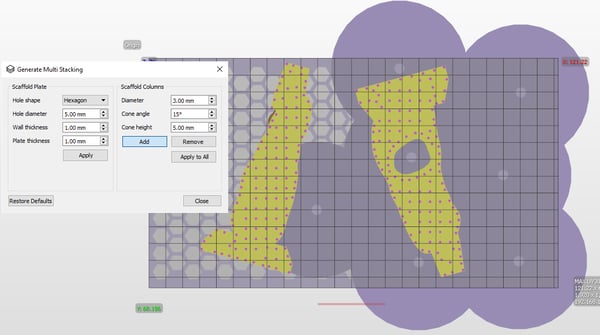
Fig. 3
Click “Apply” to add the Scaffold Plate. Then, once the plate has been added, flip the view to the bottom of the build plate before you start manually adding scaffold columns. After doing so, you should be able to see the bottom of the models with the Scaffold Plate above the models. Start adding your Scaffold Columns and ensure that the cones on the top of the columns completely fill/cover all of the hexagonal holes on the Scaffold Plate. Flip the view to the top view to ensure you have covered the entire Scaffold Plate with the cones on the end of the scaffold columns (Fig. 4).
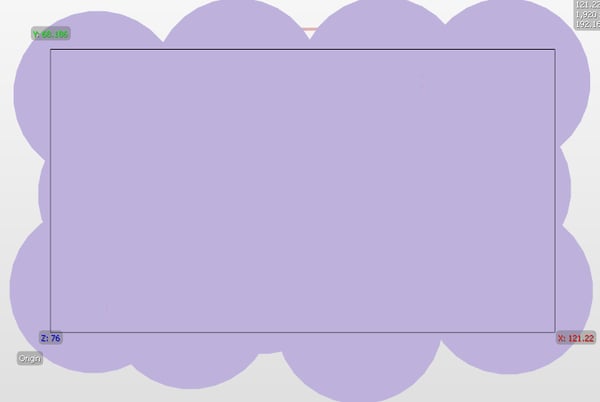
Fig. 4
You have now completed the first layer of your stacked print. Now you can start a new build and repeat the steps above to create additional layers. There is no need for a scaffold plate with columns on the top layer of your build.
When you have set up all of the layers you would like to print, click on the Build Wizard icon in the toolbar at the top. In the bottom left corner of the first screen in the Build Wizard you will see the Multi Stacking option. Check all of the layers you would like to print on your stack, then click Next (Fig. 5).
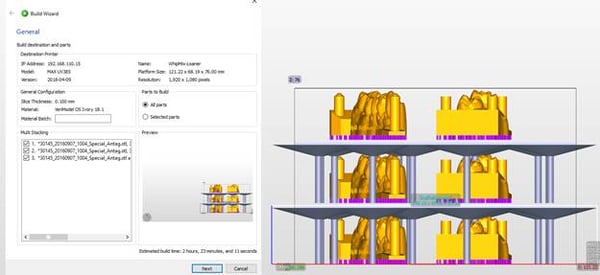
Fig. 5
On the next page you will want to set the base layer thickness. We typically use a 0.5mm. Make sure that the type of base plate you are applying to the print is a shadow base plate, by checking the box.
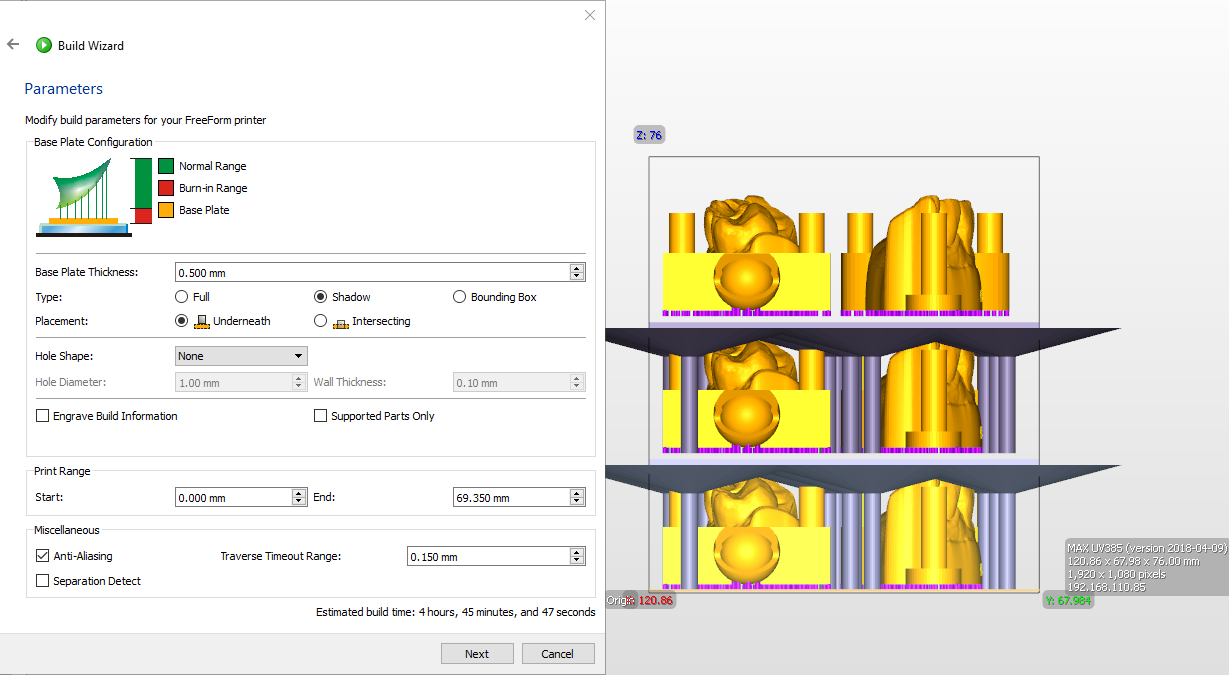
Fig. 6
How many layers you can stack depends on the “Z” height you are printing. You can print up to 76mm in “Z” height on the Asiga Max printers, and up to 200mm in “Z” height on the Asiga Pro 2 printers.
Now, when you’re at home enjoying your evening away from the lab, you can rely on the Asiga printer to continue producing high quality and accurate printed models, castables, splints and surgical guides!
Happy printing to all!


.jpg)

Leave a comment