

Hello all and welcome to the first days of fall. This is my favorite time and season of the year. I love sweatshirt weather and football! It also leads us into the fourth quarter of the year when historically, a lot of technology is purchased for tax savings. More and more doctors are buying and using intra-oral scanners and I am sure several will be purchased before the end of the year this year, so I thought it may be a good idea to re-visit the topic of the workflow involved with the IOS (intra-oral scanner).
 Our 3D printer sales have been through the roof for a third consecutive year, so I know a lot of you are already receiving digital impressions, but for those labs that have doctors that are talking about or have just purchased an IOS or for those doctors that are thinking about purchasing an intra-oral scanner this will help you in what you need to know about your new scanner and receiving digital impressions. Several intra-oral scanners have hit the market in the last couple of years and the nice thing for dentists is that the price has come down significantly without sacrificing the technology, allowing more and more practices to purchase this equipment.
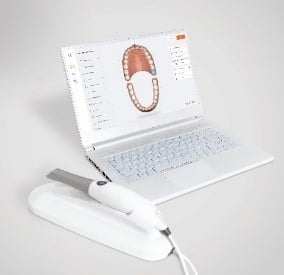
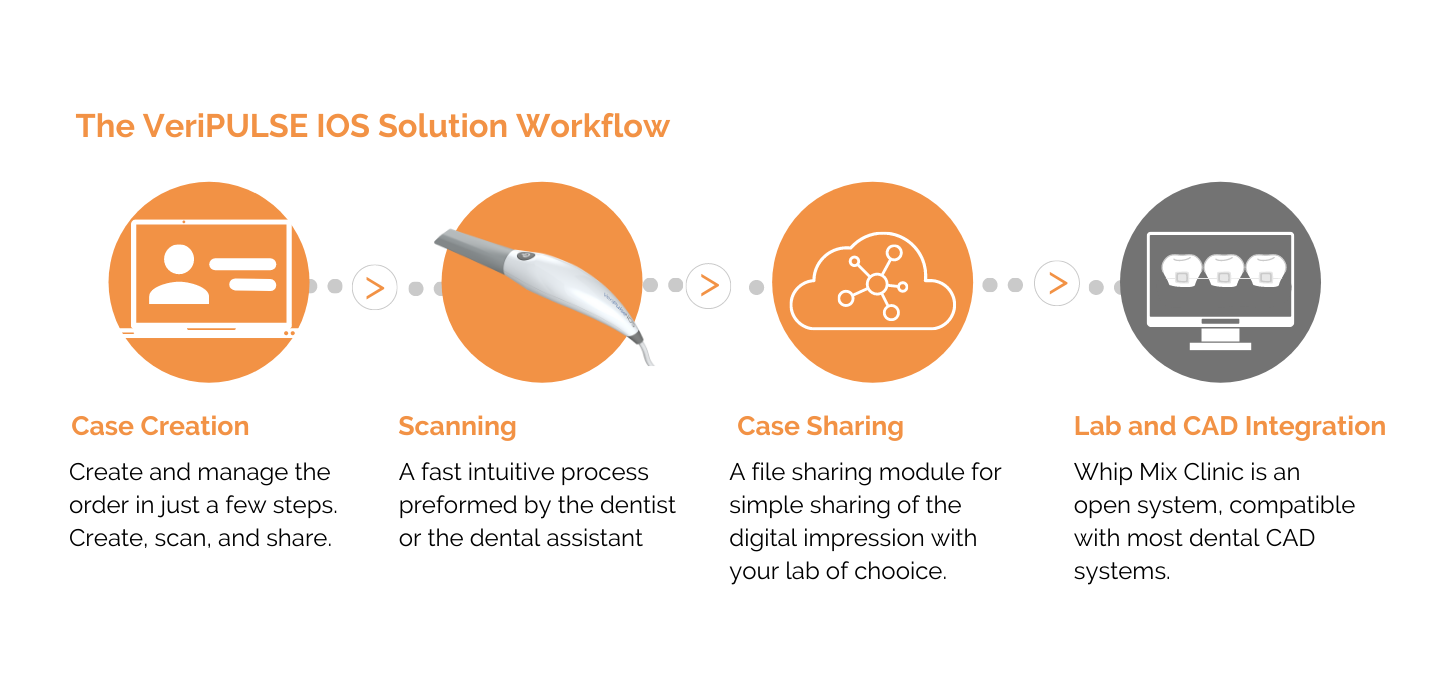
The workflow is pretty straight-forward once the IOS has been purchased. A case is created and the treatment is entered including the material and in most cases the shade. The dentist, hygienist or assistant then takes the scan. Most intra-oral scanners have some type of cloud-based platform for sharing files with their lab.
The transfer of the digital impression is an important piece for both the dentist and the lab. Some intra-oral scanners are completely open and allow the dentist to export and send the raw scan straight to their lab of choice as an .stl file. This is the main file type that all CAD/CAM software and 3D printers currently accept. Some intra-oral scanners utilize a connection center that the doctor and lab have to pay a subscription for to have access to the digital impression. Other IOS’s export in a proprietary file format and the lab must have that particular system to accept those files. Sirona and 3Shape are two examples of this. 3Shape exports as a .dcm file (it does have the ability to export a .stl file). If the lab has a 3Shape scanner and software then they can easily accept this file through 3Shape Communicate. If they do not, then they must purchase 3Shape Communicate Inbox to receive these digital impressions. Since the export of these files impacts both the dentist and the lab you can see why it is so important for the dentist to consider this when thinking about purchasing an IOS and communicate this with his or her lab.
Once the file is shared, the lab can import the impression into their CAD software and design the restoration. If you are going to print a model it is important to know that there is a step in between the scan and printing. The model must be “model built” in the CAD software. These are add on modules within a CAD platform. 3Shape (Model Builder All Scans) and ExoCAD (Model Creator) are two examples. You can also use Mesh Mixer as well.
As more and more dentists hop on the digital platform you can see how important it is that there is communication between the doctor and the lab. This communication will ensure digital success for everyone.
Cheers!


Leave a comment