


You may have heard of the Asiga Max and the Whip Mix VeriEKO 3D printers, but what’s the difference, and which of the two printers might be best for you?Actually, you can’t go wrong with either, but one may make more sense for you depending on your needs. Let’s take a comprehensive look at the printers’ differences to figure out which one would best fit your business.
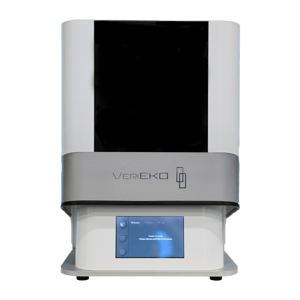
The VeriEKO is a Liquid-crystal display (LCD) printer, meaning it uses an LCD screen to turn pixels on and off in order to illuminate the image you are printing on the build plate, then cures each full layer at the same time.
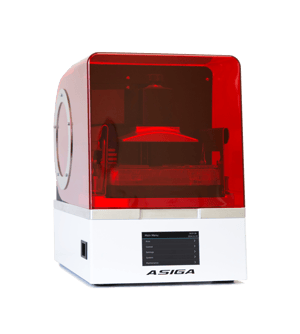
The Asiga Max is a digital light processing (DLP) printer, which uses a projector to project the image you want to print onto the build plate and then cures an entire layer at a time as well. Most – but not all - LCD printers are significantly slower than DLP printers. That includes the VeriEKO. It runs up to 2X slower on most prints in comparison to the Asiga Max. However, LCD printers are slightly more accurate than DLP printers. While the Asiga Max has stunning accuracy at 62 microns in the x and y axes, the VeriEKO is slightly more accurate at 49 microns. Additionally, DLP printers are more expensive than LCD printers due to the DLP projector technology costing more than standard LCD printer screens. This explains the difference in price point: the Asiga Max is $10,990 and the VeriEko is $4,900.
Open Material. Is it important?
You may be asking yourself: less expensive, and more accurate….who wouldn’t go with the VeriEKO? Well, there is more to printers than just speed, x,y accuracy, and price. There are several reasons that Asiga is favored by so many labs. The biggest perk of owning an Asiga printer is that they are a completely open material system. When I say completely, I mean COMPLETELY open.
Let me paint a scenario: let’s say you find this cool resin that you want to try out and no one has their hands on it yet. It’s so exclusive that it’s not one of the 500+ resin profiles in the Asiga Composer software. Even though the resin profile isn’t in the printer’s software yet, you can actually create a .ini file to print that resin on your Asiga printer anyways. You aren’t restricted to a handful of resins you can use. Pretty cool, right? This is especially valuable for those labs that like to try the latest and greatest resins that are out there and are coming down the pipeline. The VeriEKO isn’t fully open material, though you do have a large handful of resins to choose from, there still are limitations. For example, you can print dentures on the VeriEKO, but you cannot print those dentures with LDP (Lucitone digital print resin). Another cool bonus is that Asiga has an internal radiometer. What is an internal radiometer, you ask? An internal radiometer reads the printer’s light intensity during each print. This keeps your prints looking just as good on year 5 as they did on day one. Simply put, the Asiga Max is often called a “workhorse” because it is fast, reliable, and consistent.
Changing the resin trays
Both the VeriEKO and Asiga Max have two main consumable items: the resin and the trays. The Asiga Max has a quick and easy disposable tray system that you swap out upon the tray “expiring”. Asiga set this expiration system based on the volume used in each tray to ensure the quality of the prints. It prevents your prints from being affected by someone using a foggy and scratched tray (when it really should be in the trash). It also makes changing resins a breeze. I’ve seen labs swap out resins in a matter of 20 seconds on the Max- no mess, no waste, just swap out the trays containing the next resin you are wanting to print with.
The VeriEKO’s tray does require some maintenance. The clear vat on the bottom needs to be changed out from time to time as well- this is a little more labor-intensive than the Asiga, but it shouldn’t take any more than 5 minutes. You simply remove some screws on the bottom of the tray, swap out the Teflon film, and re-fasten the tray. If desired, you can also purchase the tray already put together.
For anyone new to 3D printing, you may be thinking “what’s the big fuss with these trays? I just want one that will last forever so I don’t have to worry about it.” Yes, that’d be nice, wouldn’t it? I’ve actually seen a group use the SAME tray and SAME vat for over a year and a half. They wondered why their prints weren’t coming out as accurately as they used to.
Let’s take a step back and evaluate why you don’t want to be doing this. Think about the screen protector on your cellphone. I don’t know about you, but mine needs to be swapped out pretty often. Between yellowing from it being left out in the sun, getting foggy over time from wiping it down with cleaning solution, and of course, from all of the little scratches that it gets covered with from my 2-year-old son tossing it down the stairs and onto the concrete. I know it’s time to swap it out when the image from my phone screen looks blurry. The image also gets distorted as it travels through that flawed screen protector. The same goes for the build trays that your resin is sitting in. The image you are projecting onto your build plate has to project through that clear film on the bottom of your tray. If that tray looks anything like what my phone’s screen protector looks like, then you will definitely have some issues with print quality. The image that is coming out of your projector/LCD screen is not the same crisp image that’s landing on your build platform with a flawed tray. Asiga’s tray expiration system takes the worry out of it. It makes it to where you don’t have to worry about this happening to your prints while making resin swaps easy, too.
Maintenance and Repairs
Another key difference between the Asiga Max and VeriEKO is maintenance and repairs. Everything on the VeriEKO can be repaired and replaced by you. We have instructional videos on how to repair just about anything on that printer. Parts on this printer are relatively inexpensive as well (a set of 3 LCD panels cost only approximately $300). The LCD panels on the VeriEKo will need to be replaced depending on printer use.
The Asiga Max doesn’t really require any mechanical maintenance. Because it is a DLP printer, The Asiga Max needs certified repair personnel to do some things on the printer. There are many things you can repair on your own if need be, but, for example, if the projector goes out, you cannot replace that yourself.
Asiga Max vs VeriEKO 3D Printers. Which one?
In conclusion, there’s truly no “winner” when it comes down to deciding which printer is best for you. It comes down to which printer makes the most sense for your lab. If you are a smaller lab or dental practice that is only printing a handful of models, surgical guides, or splints per day, and speed isn’t of huge importance, the VeriEKO is for you.
If you are a higher production lab or practice, and you are attracted to the versatility of using any resin you want, and you want your prints quickly, then the Asiga Max is a clear winner for you. You can’t go wrong with either option, one just may make more sense for you.
If you have any questions and would like to learn more about these two popular printers - or any other Whip Mix product - please email me at cdombrowski@whipmix.com.
Cassandra


Leave a comment