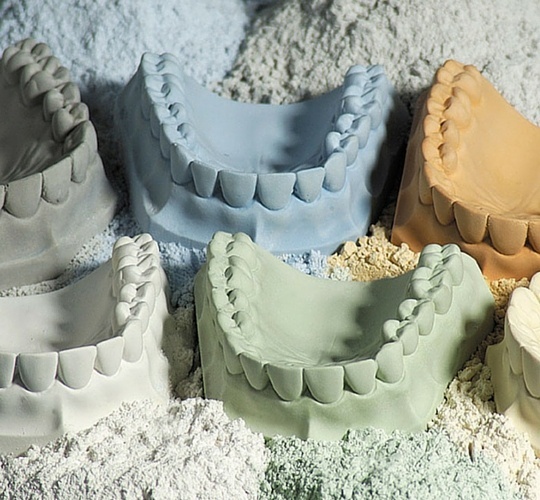
 The physical and mechanical properties of Gypsum can be manipulated by procedures that influence the difference in solubility and growth of the dihydrate crystals; certain procedures can either enhance or hinder your Gypsum material in the mixing process. Achieving an ideal Gypsum mixture that produces an optimal working consistency can be challenging but there are guidelines you can follow that take the "trial and error" out of achieving a perfect Gypsum mixture.
From preparation to pouring the impression all the way to cleaning here are some guidelines you can follow to achieve a the ideal Gypsum mix.
Preparation:
For the best results it is essential that the equipment is clean and free from residue before mixing the gypsum. Any residue would have a negative effect on the setting time and expansion of the mixture. The gypsum should be mixed under vacuum, if possible, and to the exact water/powder ratio.
Mixing Water:
Tap water, at room temperature, can normally be used for mixing. It is safe to use demineralized or distilled water. Quality may be affected if other liquids are used, such as water from the model trimmer or gypsum hardener liquids.
Adding Powder to Water:
When mixing by hand, the gypsum must be quickly and evenly sprinkled into the water within 10 seconds. In accordance with EN ISO 6873, timing starts when the gypsum and water come into contact. After the gypsum has been soaked for 20 seconds, it can be mixed with a spatula.
Mixing in a vacuum mixer improves the quality of the mixture and saves time. Manual mixing requires approx. 60 seconds and mechanical mixing 30 seconds.
The vacuum should be set at 27 inches when mixing. Altitude will affect vacuum by losing 1 inch/1000 feet. Adding water or gypsum when the consistency is too thick or too thin affects the setting process and damages the crystalline structure of the gypsum.
Pouring the impression:
The impression should be poured immediately after mixing. Pouring the impression should be completed within the working time. The gypsum begins to crystallize at the end of the working stage.
At this point, no further work should be carried out because fine details can no longer be accurately reproduced after setting begins. The strength of the gypsum is also greatly reduced. This even happens when using a vibrator. Vibration should be completed before the setting stage. Following cleaning, disinfecting and neutralizing, alginate and hydrocolloid impressions should be poured immediately with gypsum because they are not volumetrically stable.
Shaping gypsum:
Gypsums have an exact setting time. If hard stone has a setting time (final set) of e.g. 10 - 12 minutes, it can be worked on for approx. 5 minutes (approx. half the setting time).
When the surface of the stone loses its shine (loss of gloss), it can still be shaped for approx. 1 minute. After this the setting time begins. At this point no further work can be done, as this would affect crystallization.
Removing the model:
In general, the set model must not be removed from the impression for a minimum of 30 minutes after pouring.
Stone in the alginate or hydrocolloid impression should be removed after 30 minutes because these impression materials react aggressively with gypsum. It is advisable to leave other impression materials for up to an hour before removing the stone.
Setting Expansion:
All gypsums expand at the final setting. The amount of expansion depends on the composition of the gypsum, the volume of the cast and the ambient temperature or humidity. According to EN ISO 6873, comparable measurements of expansion can only be made under the same conditions. Please note that the percentage expansion of the gypsum must be measured after two hours. Compressive strength is measured in N/mm2 after one hour, and again at 48 hours.
Ensure that standards and times are accurate when making comparisons. In practice, some expansion is necessary to compensate for the contraction of other materials. Slight shrinkage occurs if the model is stored at room temperature and low humidity over a longer period. If the model is soaked, as it is sometimes necessary, expansion of the gypsum increases slightly. Whip Mix gypsums are well below the expansion values allowed by the DIN standard.
Preparing the impression:
Problems continually arise in the laboratory (time, disinfectant, saliva, blood, etc.). Since some impression materials react with gypsum, laboratory/assistants must take precautions to obtain an accurate gypsum model with a smooth surface.
Sawing the preparation:
It is advisable to saw, prepare and trim dental arches within two hours of removing from the impression. If models have to be sawn or prepared much later than that, they can be soaked briefly to prevent gypsum chipping off. Use a sharp blade.
Tip: Placing old gypsum models in water saturates it with potassium sulphate to prevent wash out. This procedure is used in military labs. The solution is called SDS.
Boiling out, steam cleaning, cleaning
These standard laboratory procedures, which are often unavoidable, must be carried out very carefully. Gypsum models have complications if exposed to sudden changes in temperature.
We strongly recommend immersing the model in warm water at approx. 50°C for a few minutes to avoid chipping or even completely fracturing the model. Steam-cleaning the model can also lead to surface abrasion. In many cases it is better to clean the model using a soft brush and a soap solution.


Leave a comment