


In a previous blog we discussed the reasons that posterior crowns adjusted using the 3Shape Virtual articulator (VA) usually require additional adjusting and grinding at the bench. As discussed, this is not the fault of the VA, but rather the geometry of movement resulting from the fact that cases mounted on simple (plastic) articulators do NOT MOVE IN A PHYSIOLOGIC WAY. We discussed how to “fool” the VA into more closely duplicating these “tooth guided” movements by positioning the models (Figure 1), then maximizing the Bennett setting and minimizing the condylar guidance setting. Once this is done, it is then a simple matter of properly adjusting the occlusion.
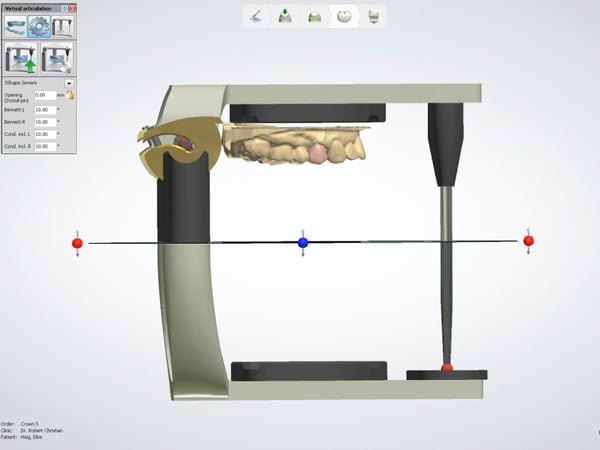 Figure 1
To this end, it is imperative to set up the articulator and occlusion properly to show the correct functional interferences so they can be properly adjusted. The first thing is to set the proper vertical dimension. For whatever reason, the teeth tend to penetrate through each other by a small amount. This effectively lowers the centric occlusion and will result in shy occlusion if not corrected. To accomplish this, select the “Modify Jaw Alignment” icon and turn on collision lines (Figure 2). Then raise the vertical opening until the penetration disappears (Figure 3). This is usually in the range of .050mm to .100mm (50 to 100 microns). Unfortunately, the “Optimize Occlusion” option rarely if ever aligns the occlusion properly so I DO NOT recommend using it!!
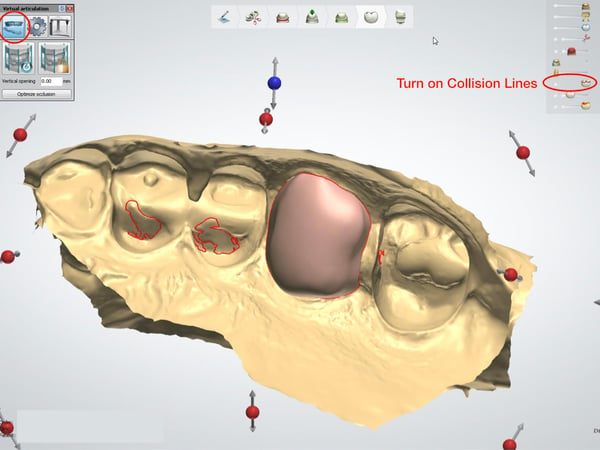 Figure 2
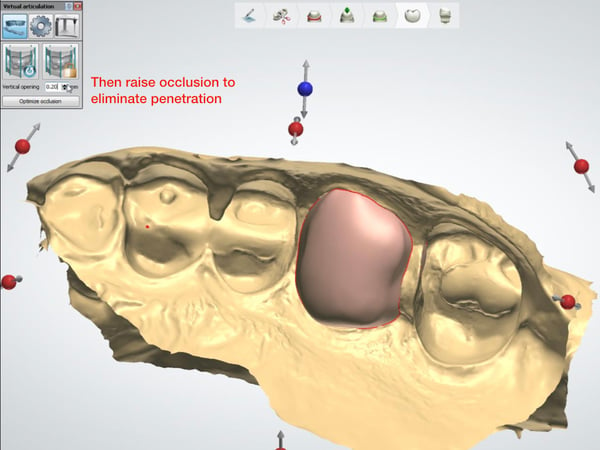 Figure 3
After designing the occlusal, cut the contacts to - 0.01mm so you can see where they are. Any more and they will overly interfere when using the VA and any less and they become difficult to see (Figure 4).
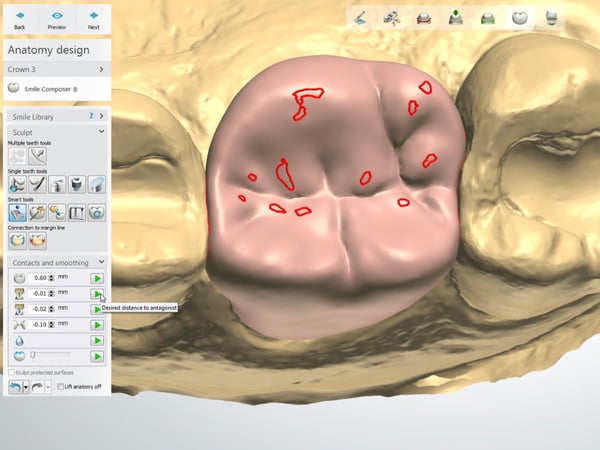 Figure 4
Next, invoke the VA being sure to check all 3 boxes (Figure 5), INCLUDING the coloring icon to activate the Occlusal Compass. Otherwise all contacts will show up blue and you will NOT be able to distinguish what types of contacts exist in function (Figure 6).
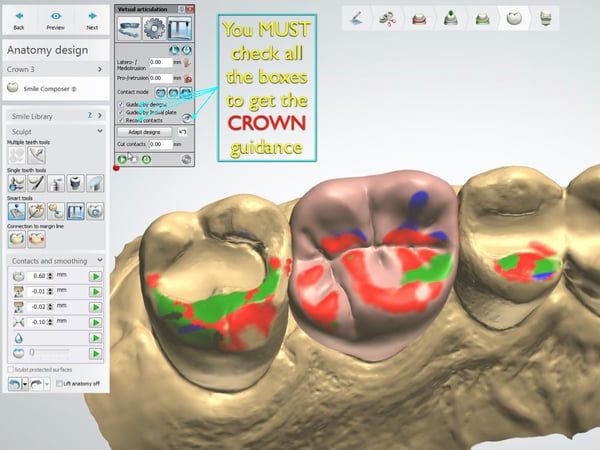 Figure 5
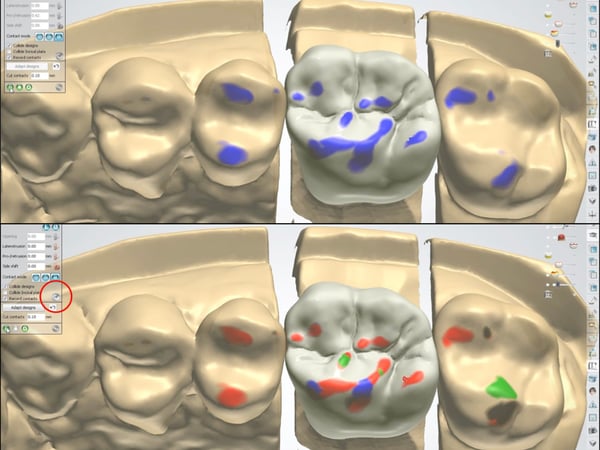 Figure 6
In the 3Shape occlusal compass, red shows centric contact areas, blue shows working interferences, gray shows protrusive interferences, and green shows balancing interferences. According to the 3Shape legend for the occlusal compass, red is defined as “Immediate Side Shift” but is probably better defined as “Broad Centric”, since it more accurately represents the markings achieved when the teeth are “ground” together around centric leaving broad centric contact markings. These red marks do not require adjusting so long as the actual centric marks (collision lines) are correctly placed (Figure 7).
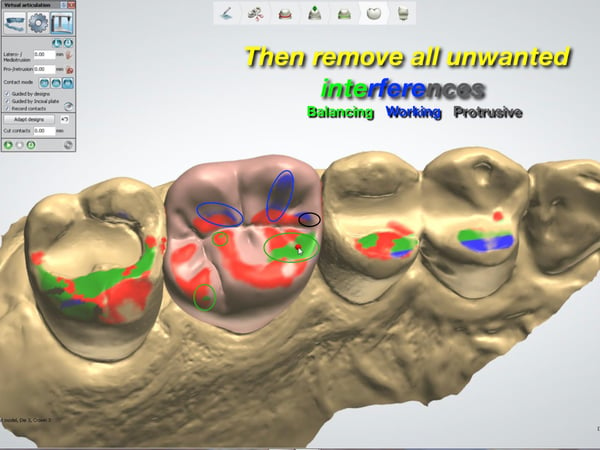 Figure 7
In general, balancing interferences (green) and protrusive interferences (gray) are quite destructive and should always be removed. The working interferences (blue) can also be considered “group function” and while they are generally not destructive and well tolerated by the patient, they too should be eliminated. All unwanted interferences should be removed using the sculpting tools and NOT the auto adjust function as this will also remove desired centric contacts (Figure 8).
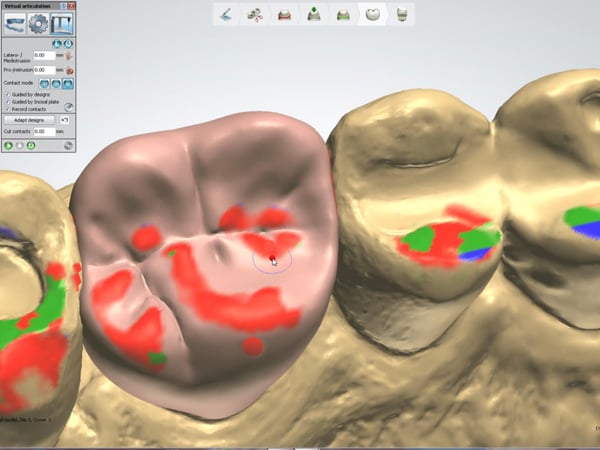 Figure 8
Unfortunately, the type of contacts removed with the auto adjust function CANNOT be defined. After all, unwanted interferences are removed the occlusion should be cut to 0.00 (Figure 9). In the case of full arch models mounted on a simple articulator, follow the exact same procedure (Figure 10).
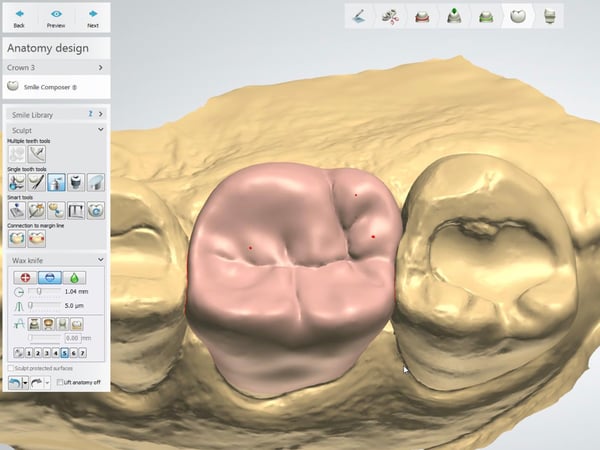 Figure 9
 Figure 10


Leave a comment