


As a dental technician with more than 40 years of experience, I have been fortunate enough to begin my career working directly with board certified prosthodontists who introduced me to the importance of using a Semi adjustable articulator. As such, I have experienced a rewarding and successful career. Over the years, I have seen a continuous decline in the teaching of the importance of using a full size semi-adjustable articulator in dental education, for both dental students and laboratory technicians. This lack of understanding has resulted in frustration and low expectations for the prostheses manufactured. My goal in this 2-part article is to explain the need and the importance of using a full size semi-adjustable articulator to replicate the movements of a complicated system like the oral cavity with its compliment of bone, tissue, fluid, ligaments and muscle was a daunting task for early pioneers the early 1800’s when articulators were introduced (Fig. 1).
 Fig. 1
The first patent for an articulator in the U.S. occurred in 1840 by two Philadelphia, PA dentists: James Cameron, and Daniel T. Evans. Because this instrument was more of a hinged instrument, it did not replicate mandibular movement. By the 1900s, single hinge dental articulators became commonplace (Fig. 2).
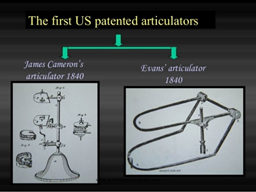
Fig. 2
In 1910, doctors W.E. Walker, Alfred Gysi and George Snow, introduced their work on condylar movements. From their work, two major schools of articulators developed. On one side there was the new condylar (anatomic) movement, and on the other side there was the geometric (non anatomic) movement. These early instruments were regarded as being complicated and cumbersome.
Dr. Ed Starke and many other learned clinicians have written extensively on the early thinking and articulator designs that have brought us to where we are today. I recommend you read these fascinating articles for more in-depth information. Let’s take a look at the articulator and try to understand its purpose and importance in dentistry.
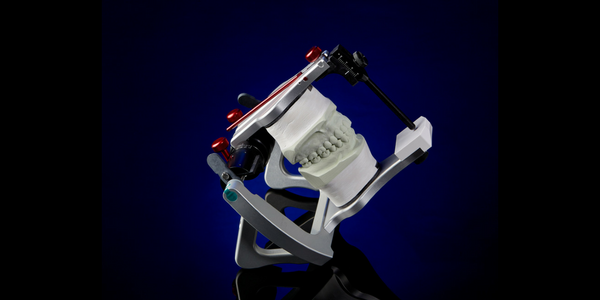
Today, semi-adjustable articulators are designed to be more user friendly, less complicated, interchangeable, have field calibration possibilities, and even possess a sleek, eye-catching appearance. Most articulators on the market are manufactured to have the intercondylar width fixed at 110 mm (Fig. 3). This is the average distance between the left and right condyle. (William G. Bonwill, October 4, 1833 - September 24, 1899). Incorporating this average setting makes the articulator less complicated while working within the patient’s oral parameters.
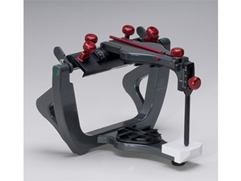
Fig. 3
Although an important tool for the dentist, the articulator is usually the first instrument a newly graduating dentist parts with upon graduation. Followed very closely by the face bow. I have spoken with many dentists and dental students who tell me their training is very limited on the use of these instruments. In my opinion, this is part of the reason for its non-important status in the dental office.
In general, movements on semi-adjustable instruments replicate mandibular movements fairly well, and satisfy the fabrication requirements of most dental prostheses. Let's look at how this happens. When the clinician/technician selects an instrument, they are basing their selection on the instrument's ability to reproduce certain movements of the mandible. First in this category is setting the instrument to produce movements that will help determine the occlusal anatomy. This is achieved by using the Posterior and Anterior control areas available in the design.
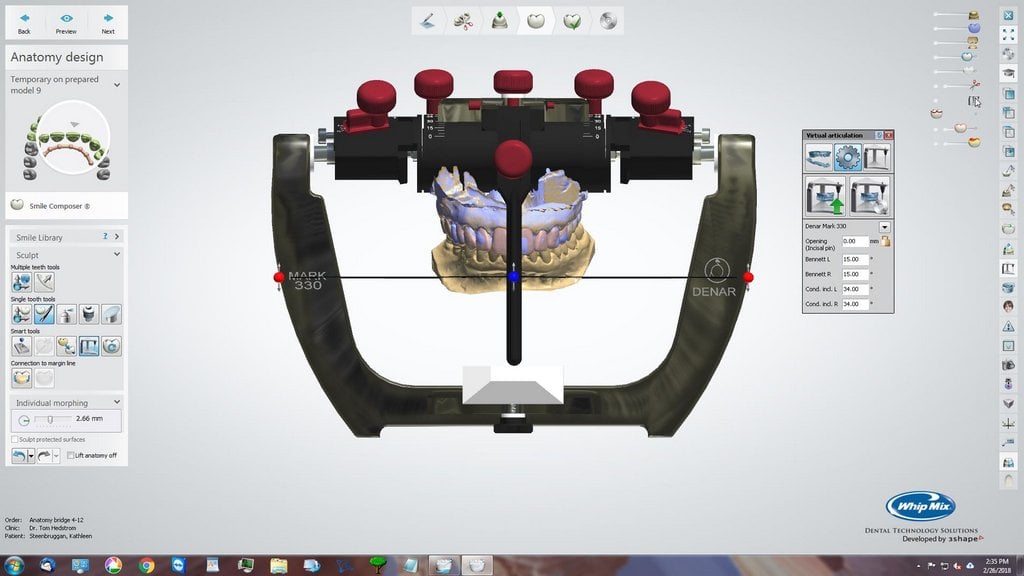
The posterior controls are located at the posterior of the instrument and are designed to replicate the patient’s temporomandibular joint (TMJ) (Fig. 4 - #1). The anterior controls are used to correlate the patient’s vertical overbite and horizontal overjet (Fig. 4 - #2). This is the function of the adjustable incisal guide table or a custom incisal guide. A more in-depth discussion on how these control settings effect the occlusal scheme will be presented in a future article.
One other important consideration in relation to these two controls is the accurate placement of the mounted casts. In order for the function of the posterior and anterior controls to work at their maximum efficiency, the casts have to be at the correct vertical dimension (Fig 4 - #3). The casts’ position in relation to the condylar axis is very critical, to ensure that the axis of rotation matches the patients arc of closure as well as other excursive movements. This can be achieved by using an earpiece face-bow.
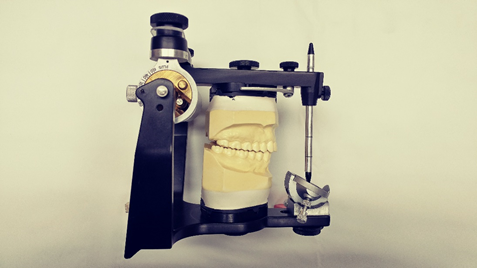
Fig. 4
Semi-adjustable articulators usually provide the clinician or technician with up to three adjustments for programming purposes. These settings usually include lateral or Bennett Progressive Side Shift, Bennett Immediate Side Shift, and Condylar Inclination. Fully adjustable articulators have up to six or more additional settings. A discussion on the fully-adjustable instrument gets us into the area of added complication. I will provide a quick introduction for each adjustment available on the Semi-adjustable articulator and its impact on the occlusal scheme.
In Part 2 of this Blog, we'll define these adjustments and learn how and when to apply them.
Understanding the basics of the articulator and what it do can for you will have a huge impact on the outcome on the cases fabricated using them. How you go about selecting one and knowing what the adjustments can do for the occlusal scheme you want to develop or follow is central to the successful delivery of the completed case.


Leave a comment