


It is important to understand that no matter which articulator type anterior smile design cases are mounted on, they should ALWAYS be adjusted using a full frame articulator. This is because it is virtually impossible to manipulate these kinds of cases properly when they are mounted on simple articulators like the Vertex or Orbix. The bench technician should respect the functional design in these situations (Figure 1).
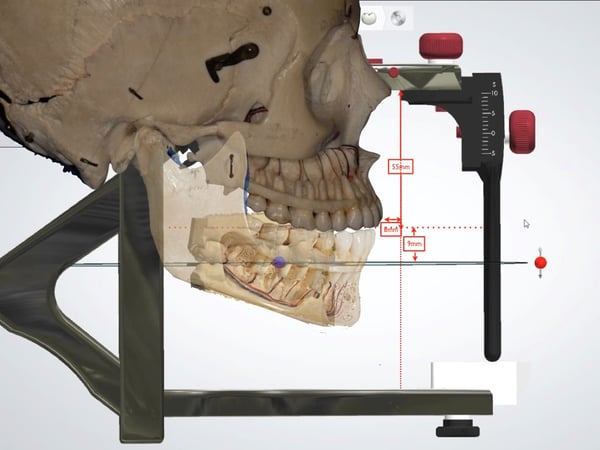 Figure 1
In previous blogs, we discussed how to properly place the maxilla into the VA since it is always initially placed into the wrong position. This is true no matter which full frame actual articulator you choose. The proper position is shown again in Figure 1.
Before beginning the functional design of the lingual surfaces, it is imperative that any existing balancing interferences (green) be eliminated as seen on #3 in this example (Figure 2). To see these interferences properly, it is important to UNCHECK the “Guided By Designs” box in the VA. Then it is a simple matter of increasing condylar guidance until any balancing interferences disappear. Don't forget to re-check the box once this is done!
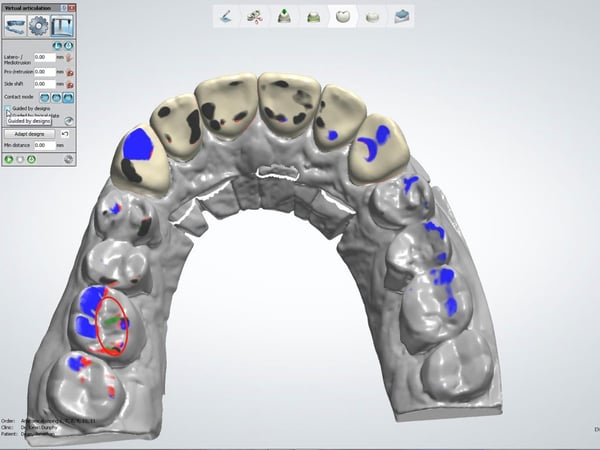 Figure 2
After the smile design is finished, establish centric contacts on just the marginal ridges of the four incisors, and on the mesio and/or disto-lingual inclines of the cuspids, depending on the specifics of the occlusion. If the occlusion is such that the only possible centric contact is in a lingual fossa of any incisor, then it is OK, but try to keep them on heights of contour whenever possible. Once this is done, cut the centric contacts to -0.01mm so they are visible without being obtrusive. It is now time to adjust the functional occlusion.
Step 1: Eliminate any working interferences (blue) on the posterior teeth (Figures 3 and 4), by adding to the lingual incline of the appropriate cuspid. Add only enough to just clear the posterior teeth in lateral (working) movements.
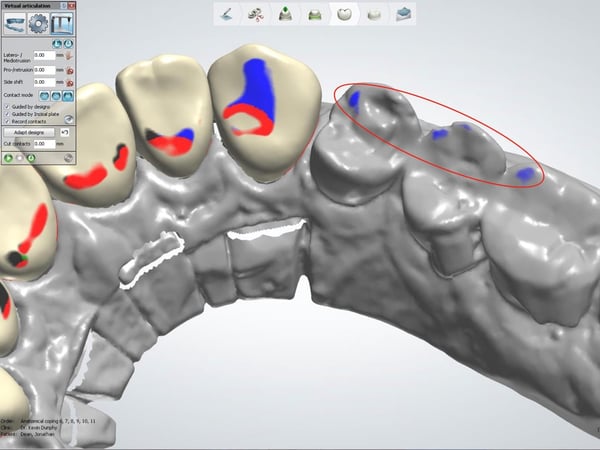 Figure 3
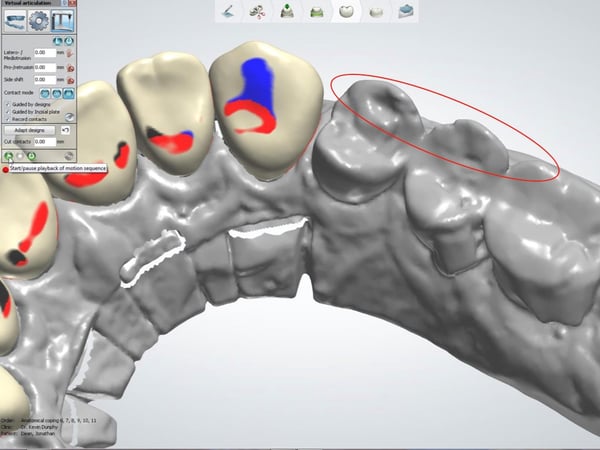 Figure 4
Step 2: Eliminate any protrusive interferences (black) that exist on posterior teeth (Figure 5), by adding to the disto-lingual portion of the cuspid(s) (Figure 6). If these surfaces are not functional due to the nature of the occlusion, proceed to the next step.
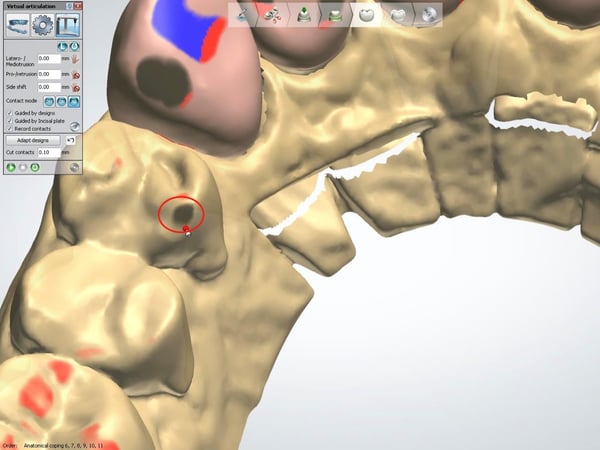 Figure 5
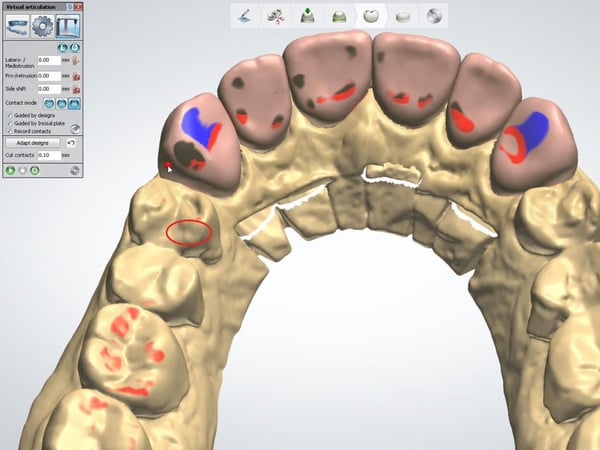 Figure 6
Step 3: Harmonize the group function in protrusion on all the marginal ridges that have centric contacts. Ideally, this will be all eight of them (Figure 7). These should also harmonize with the disto-lingual inclines of the cuspids if they are functional. The 3Shape VA is very nice in that the intensity of the function is reflected in the density of the color. Adjust until all protrusive marks are about the same intensity as shown in Figure 8.
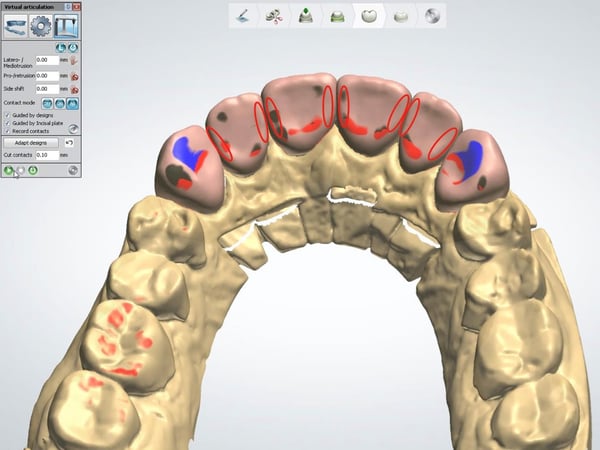 Figure 7
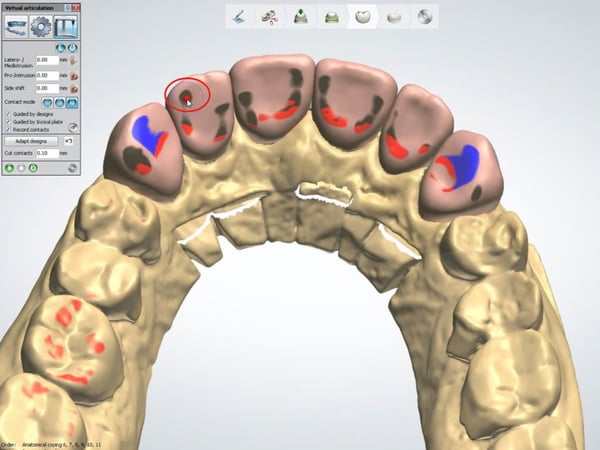 Figure 8
Note also the protrusive contact near the disto-incisal edge of #7. This is by far the most common place for incisal edge chipping of restorations. ANY CONTACT IN THIS AREA OF THE LATERAL INCISORS MUST BE ELIMINATED! The same holds true for the mesio-incisal corner, although issues here are far less common due to the supporting group function on the marginal ridges of the centrals. Figure 9 shows the properly designed and adjusted function of the anterior teeth. Note that a small amount of function was also achieved on the distal aspect of the disto-lingual incline of the left cuspid as well.
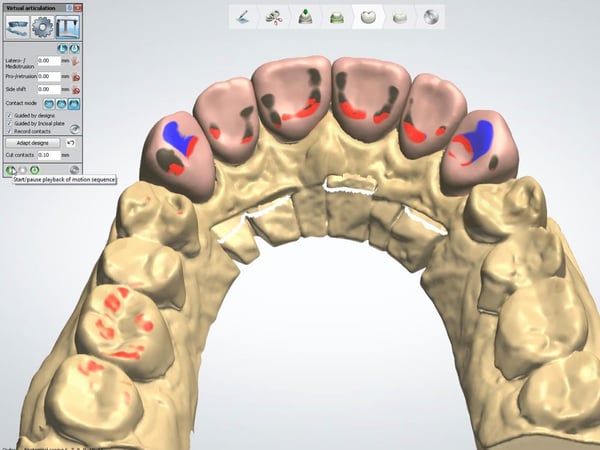 Figure 9
Step 4: The last thing to do is to cut the centric contacts to 0.00mm. (Figure 10). They were left at -.010 during adjusting in order to be able to see them without having them so heavy that they affect the functional occlusion. Note that all the centric contacts are on the marginal ridges (heights of contour) and none are in a fossa.
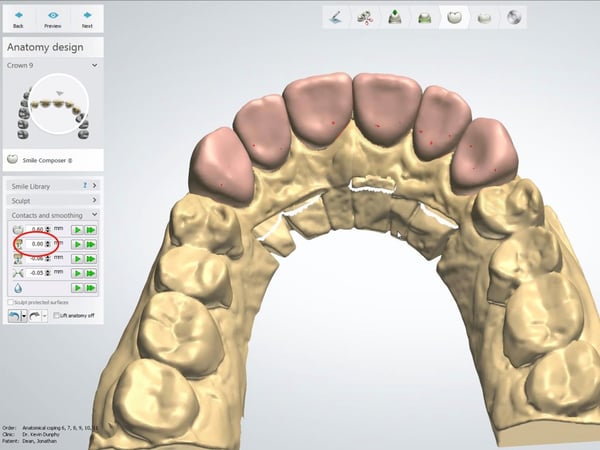 Figure 10


Leave a comment