


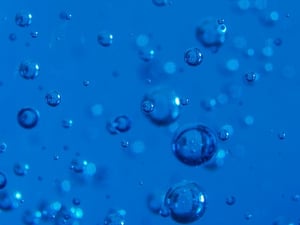
 The goal with any restoration is to simulate natural dentition as much as possible. Restorations that contain air bubbles can cause an odd appearance at best, depending on where they are. In the worst case, they can not only affect the appearance, they can actually compromise the strength of the case, resulting in fractures.
The first step in ensuring a bubble free vibrant stacked ceramic restoration is making sure the materials are of a high quality. The metal cast needs to be clean before casting. The tips of the torch should be relatively carbon free and a crucible dedicated to each type of metal shouldn’t have excessive carbon or slag buildup. Impurities entering the metal usually do so when we fail to consider what the molten metal is contacting.
Finishing
Next consider what we are to be finishing the framework with once it is cast. Are you using the alloy manufacturers recommended finishing burs, stones and wheels? Once you have the correct tool for finishing, are you finishing in one direction, creating a satiny finish, or are you finishing in many directions? Multiple directions can trap air in the tiny folds of metal and will usually migrate to the surface by the second main body firing. If this happens, it can mean stripping the entire restoration and refinishing the metal. A properly finished restoration should be cleaned in an ultrasonic to remove any abrasive particles, dirt and oils that are attached to the surface during finishing. These tiny particles are the number one cause of bubbles in a fired ceramic restoration. The cleaned restoration should then be run on an oxidation cycle in your porcelain furnace according to the alloy manufacturer’s recommendations to expel any gasses that may be present in the metal from the casting and finishing process.
Applying the Opaque
When applying the opaque it is important to apply a thin “wash coat” whether you are using powder, paste or spray. This first layer will create a strong bond for the ceramic to the metal for the main opaque firing, as well as the subsequent layers of porcelain that will follow. The main layer of opaque should be applied evenly but not too thick. Thick areas may not show bubbles initially, but as continuous layers of porcelain are built up trapped air can migrate to the surface. When you are confident you have an even “egg shell “ texture opaque layer, then you are ready to move on to our main porcelain buildup.
Building Up the Restoration
In a similar pattern we will want to do some type of wash coat of our body ceramic to facilitate a strong bond between our opaque and our porcelain buildup. Again, this should be tailored to the type of porcelain we are using and you should follow the instructions specific to that particular product. When you are happy with your ceramic wash coat you can begin to build the restoration. Some dental technicians take great pride in how few firings it took to achieve their final result. While it’s true, excessive firings can over vitrify the ceramic; you shouldn’t run the risk of an overly thick buildup potentially being fired with air trapped inside. It is crucial to remember that if you choose to take this minimal firing path, you need to remove all excess air and moisture. One way to do this is throughout the build up process, gently vibrate and blot your ceramic to create a more of a denser bubble and moisture free restoration. Failure to eliminate the air can cause blistering of the ceramic that may or may not migrate to the surface. If you are pleased with your restorations shape and appearance then you are ready to glaze. However, you should remember that air bubbles might not show up till this end stage. If this happens, at best minor adjustments and a reglaze will correct it, at worst, it could mean totally stripping the restoration down to the metal and starting over.
Of course during the entire process we want to make sure we have sufficient vacuum and a calibrated furnace, a zero vacuum will cause bubbles everywhere. The myth a high vacuum causes bubbles is just that, a myth. As you have seen there are many points where we can end up on the wrong path that can result in delays and added expense that translates to customer dissatisfaction. The key here, like so many processes in the dental field, is quality materials and above all attention to detail. Even a technician with decades of experience can have issues if they become complacent. The truth is, we don’t always do it the same way every time, and even if we are very consistent environment it can still cause issues with the physical characteristics of our materials. What you can do as a dental professional is to stay sharp and focused on time tested processes to minimize undesirable results.
Photo Credit: !Ben via Compfight cc


Leave a comment